


I remember the excitement of finding old tin cans in my grandmother’s attic. They could be turned into something new and exciting. This childhood hobby has grown into a passion for making desk accessories from everyday items.
Did you know office workers spend about 50% of their time looking for lost items or dealing with clutter? Upcycling tin cans into unique organizers can solve this problem. It makes your workspace more organized and efficient.
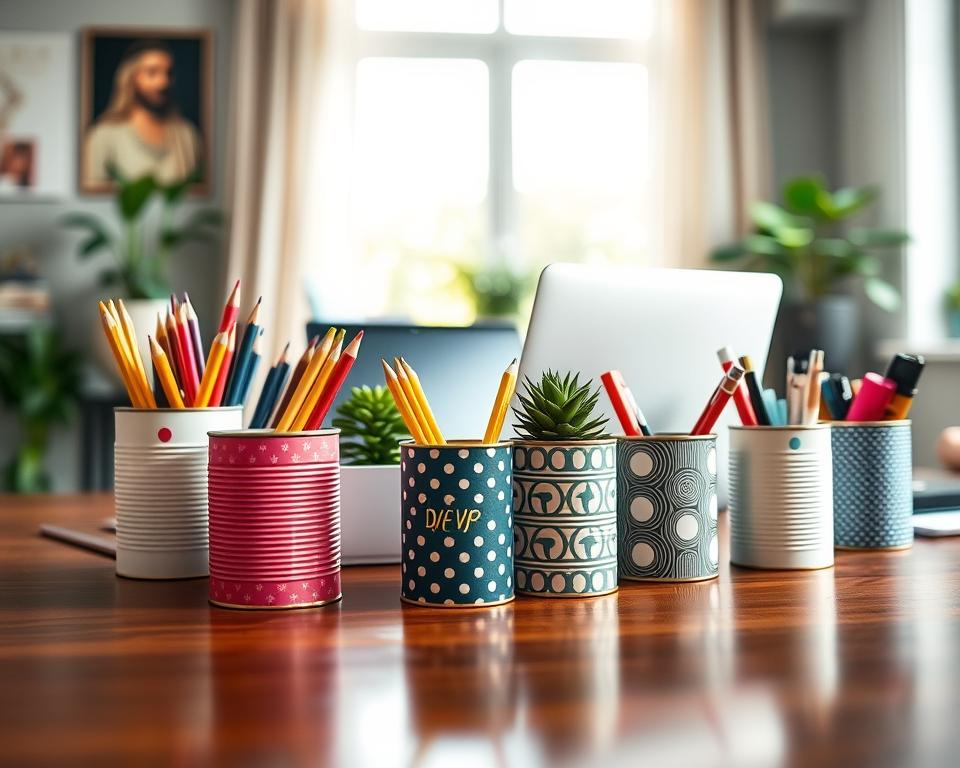
By doing DIY desk organization, you can also reduce waste and make your office more personal. In this article, we’ll show you how to upcycle office supplies. We’ll also give you ideas for making your own tin can desk accessories.
Key Takeaways
- Upcycle old tin cans into functional desk organizers
- Reduce clutter and increase workspace efficiency
- Add a personal touch to your office with unique accessories
- Explore creative ways to repurpose everyday objects
- Enhance your productivity with a more organized workspace
Why Upcycled Tin Cans Make Perfect Desk Organizers
Using upcycled tin cans for desk organizers is great for the planet. It also makes your workspace more personal. This method is both good for the environment and saves money.
Environmental Benefits of Upcycling
Upcycling tin cans keeps them out of landfills. It also saves resources needed for new materials. This way, we use less raw materials and reduce environmental harm.
It’s a step towards a greener planet. It supports sustainability and helps our planet stay healthy.
Cost-Effectiveness Compared to Store-Bought Options
Making desk organizers from tin cans is cost-effective. You probably have tin cans at home that you can use. This makes it a cheap DIY project.
For ideas, look at projects like the upcycled tin can caddy.
Customization Possibilities for Your Workspace
Upcycling tin cans lets you get creative. You can paint, decoupage, or wrap them to fit your decor. This makes your desk accessories both useful and unique.
By choosing upcycled tin cans, you help the environment. You also make your workspace more personal and functional.
Essential Materials and Tools for Your Tin Can Projects
To start your tin can crafting journey, you’ll need the right materials and tools. The type of tin can you choose is key for your project’s success.
Types of Tin Cans That Work Best
Not all tin cans are good for crafting. Tin cans with a thick, sturdy wall are best for making durable desk accessories. Cans that held food items like vegetables, fruits, or coffee are great choices.
| Type of Tin Can | Best Use |
|---|---|
| Large Coffee Cans | Pencil Holders, Storage Containers |
| Small Vegetable Cans | Paper Clip Containers, Mini Planters |
| Tall Soup Cans | Desk Organizers, Pen Holders |
Basic Tools You’ll Need
To work with tin cans, you’ll need basic tools. A good pair of scissors or tin snips is key for cutting the cans. You’ll also need a hammer, a nail or punch, and a file or sandpaper to smooth edges.
- Scissors or Tin Snips
- Hammer
- Nail or Punch
- File or Sandpaper
Optional Materials for Decoration
To add a personal touch, use various decorative materials. Paint, glue, and decorative tape are good options. You can also use fabric, ribbons, or decoupage for a unique look.
“The art of crafting is not just about creating something useful, but also about making it beautiful.”
Safety Equipment You Shouldn’t Skip
Safety is always first when crafting with tin cans. Gloves and safety glasses are must-haves to protect from sharp edges and hazards.
- Gloves
- Safety Glasses
- Work Surface Protector
With the right materials and tools, you’ll be ready to make beautiful and functional tin can desk accessories.
Preparing Your Tin Cans: Safety and Cleaning
Before you start crafting with tin cans, it’s important to prepare them right. This ensures a safe and smooth creative process. It also helps you get professional-looking results without any hazards.
Removing Labels and Adhesive Residue
To begin, remove any labels and adhesive residue from the tin cans. Soak them in warm soapy water for about 30 minutes to loosen the glue. After that, use a scrubber or scouring pad to get rid of the labels and residue.
If the adhesive is hard to remove, try using a bit of cooking oil or adhesive remover.
Properly Cleaning the Inside and Outside
After removing the labels, clean both the inside and outside of the cans well. Mix baking soda with water to scrub off grime or rust. Then, rinse the cans with warm water and dry them with a towel.
Sanding Sharp Edges for Safety
To avoid cuts and injuries, sand down any sharp edges on the tin cans. Use fine-grit sandpaper to smooth out the edges. This makes them safe to handle.
Applying a Base Coat for Better Decoration
Applying a base coat to your tin cans helps paint and decorations stick better. Use a primer made for metal surfaces and apply a thin, even layer. Let the primer dry completely before starting your craft project.
By following these steps, you’ll create a safe and clean base for your tin can crafts. This ensures they look great and last longer.
Creating Basic Tin Can Desk Accessories: Step-by-Step Guide
Now that we’ve prepared our tin cans, it’s time to get creative. We’ll make basic desk accessories. With simple tools and imagination, you can turn cans into useful desk organizers.
Simple Pencil Holder Tutorial
To make a pencil holder, you need a tin can, decorative paint, and a brush. Clean and dry the can thoroughly before painting. Pick a color that fits your office or go bold.
Once the paint dries, your pencil holder is ready. You can fill it with pens, pencils, or paintbrushes.
- Apply a second coat of paint if necessary
- Add decorative elements like ribbons or stickers
- Fill with pens, pencils, or paintbrushes
Paper Clip and Thumbtack Containers
For paper clips and thumbtacks, use a smaller tin can. Altoids cans or small soup cans work well. Clean and paint them like the pencil holder.
Once dry, they’re perfect for storing small office supplies. This keeps your desk tidy.

Business Card Holder Design
A business card holder is a thoughtful desk accessory. Attach a small tin can to a wooden base or a decorative plate. Use glue or hot glue.
Paint and decorate the can to match your office decor. This holder keeps your business cards organized and easy to find.
“Creativity is the ability to introduce order into chaos.” – Eric Hoffer
Phone and Tablet Stand Construction
To make a phone or tablet stand, use a larger tin can and sturdy wire (like a coat hanger). Cut the wire into lengths and attach it to the can. Be careful with sharp edges.
Paint and decorate the can to make it look good. This stand will hold your device at a comfortable angle.
By following these tutorials, you can make various desk accessories from tin cans. You’ll reduce waste and have a more organized, personalized workspace.
Advanced Tin Can Desk Accessories for the Creative Professional
Ready to take your creativity to the next level? Advanced tin can desk accessories offer endless possibilities. As a creative pro, you know how important a tidy and inspiring workspace is. Let’s dive into some advanced projects to enhance your space.
Multi-Compartment Organizer System
A multi-compartment organizer system is a game-changer for office supplies. You’ll need different-sized tin cans for this. Clean and prepare the cans first. Then, set them up in a way that fits your space and needs.
Use strong adhesive or metal glue to connect the cans. This advanced tin can craft helps you organize your supplies efficiently. It keeps your workspace neat.
For better use, label each compartment. Use a label maker or paint pens for clear labels. This makes your organizer more useful and adds a professional touch to your creative desk organizers.
Desk Lamp with Decorative Cutouts
Turning a tin can into a desk lamp is a rewarding challenge. Pick a good tin can and clean it well. Use a metal cutter or Dremel to make decorative cutouts. Be careful and wear protective gear.
Once your design is done, attach a lamp kit or tea light holder inside. This professional workspace accessory adds light and uniqueness to your space.
- Choose a tin can that fits your lamp needs.
- Make detailed cutouts with a pattern or design.
- Always wear safety gear when using sharp tools.
Mini Succulent Planters for Desktop Greenery
Adding greenery to your workspace boosts mood and productivity. Tin can mini succulent planters are perfect. Clean and decorate the cans, then fill them with soil and succulents. These planters bring life to your desk and show your creativity.
To improve the planters, add small rocks or pebbles on top of the soil. This helps with drainage and looks nice. Place your planters where they get enough sunlight for your succulents to thrive.
Magnetic Board and Note Holders
A magnetic board from a tin can is practical and versatile. Attach a strong magnet to the back of a cleaned and decorated tin can. Use it to hold notes, reminders, or small tools on your metal desk or magnetic board. This advanced tin can craft adds function and style to your workspace.
Consider making multiple magnetic note holders in different sizes. Arrange them in a collage or place them around your workspace. This maximizes their use as professional workspace accessories.
Decorative Techniques to Transform Your Tin Can Creations
With a few simple steps, you can make tin cans into amazing desk organizers. The right touches can make your creations pop and add a personal flair to your desk.
Paint Finishes and Techniques
Painting is a simple way to decorate tin cans. You can use acrylic paints for bright colors or metallic paints for a sleek look. Try ombre or stippling for interesting designs.
- Use a primer for better paint adhesion
- Apply thin coats to avoid drips
- Seal with a clear coat for durability
Decoupage and Paper Wrapping Methods
Decoupage is about gluing cut-out images onto cans, while paper wrapping wraps the can in paper. Both offer endless design options. Use scrapbook paper, newspaper clippings, or music sheets for unique designs.

Fabric, Twine, and Ribbon Embellishments
Wrapping tin cans with fabric, twine, or ribbon adds texture and warmth. This is great for a cozy, rustic look. You can use glue or decoupage medium to hold it in place.
Embossing, Stamping, and Texturing Effects
Embossing, stamping, or texturing gives your cans a tactile feel. These methods create detailed designs. Use embossing tools or metal stamps for detailed embellishments.
By trying these techniques, you can turn simple tin cans into beautiful, useful pieces that show off your style.
Organizing Your Workspace with Coordinated Tin Can Desk Accessories
Keeping your workspace organized is key to being productive. Coordinated tin can desk accessories can really help. They make your workspace both functional and beautiful, improving your work experience and efficiency.
Creating a Cohesive Color Scheme and Style
Start by picking a color scheme that fits your workspace. Choose colors that match your office or inspire you. For example, blue and green can make your space calm, while yellow and orange can spark creativity.
Think about the style you want. You might prefer a simple, minimalist look or a more lively atmosphere with bold colors and patterns.
Arranging Multiple Accessories for Maximum Efficiency
After making your tin can desk accessories, arrange them for the best efficiency. Put your most-used items where you can easily reach them.
- Keep your pencil holder close to your desk.
- Place paper clip and thumbtack containers near your desk.
- Use a business card holder to keep your cards organized and visible.
Attaching Cans Together for Custom Organizer Systems
To make a custom organizer, attach multiple tin cans together. Use glue, tape, or other adhesives. This way, you can create a system that holds many office supplies.
| Organizer Type | Description | Benefits |
|---|---|---|
| Single Can Organizer | A single tin can used to hold one type of office supply. | Simple and easy to create. |
| Multi-Can Organizer | Multiple tin cans attached together to hold various office supplies. | Customizable and highly efficient. |
Incorporating with Other Desk Elements
To make your workspace look seamless, mix your tin can desk accessories with other desk items. For example, put your tin can pencil holder next to your computer or with your desk calendar.
“A cluttered workspace can lead to a cluttered mind. By organizing your workspace with coordinated tin can desk accessories, you can create a more focused and productive work environment.”
By following these tips, you can make a workspace that’s both useful and looks good. With coordinated tin can desk accessories, you’ll work more efficiently and enjoy your work more.
Troubleshooting Common Issues with Tin Can Crafts
Tin can crafts can be fun but sometimes face problems. Issues like rust, paint problems, or stability can arise. Knowing how to fix these can keep your desk accessories looking good and working well.
Preventing and Dealing with Rust
Rust is a big problem with tin cans. To stop rust, apply varnish or sealant after painting. If rust starts, sand it lightly and use a rust-inhibiting primer before painting again.
Fixing Paint Problems and Adhesive Issues
Paint issues can happen if the surface isn’t ready or the wrong paint is used. Make sure the tin is clean and dry before painting. Use a primer if needed. For adhesives, try a different one or use a small amount.

Stabilizing Wobbly Cans and Reinforcing Weak Points
If your tin can is wobbly, add a non-slip base or some weight. For weak spots, use glue or tape to strengthen it.
Maintenance Tips for Long-Lasting Accessories
To keep your tin can crafts looking great, avoid too much moisture or sunlight. Dust and clean them often to keep them looking good.
By using these tips, your handmade tin can desk accessories will last longer. They’ll stay both useful and stylish.
Conclusion: Showcasing Your Handmade Desk Accessories
When you finish your tin can desk accessories, you’re doing more than just organizing. You’re showing off your creativity through DIY workspace organization. By using tin cans, you’re giving old materials a new life, which is all about creative reuse.
Showing off your handmade desk accessories can inspire others to be creative too. Maybe it’s a pencil holder painted beautifully or a smart cable organizer. Your work makes your workspace special and personal.
By choosing DIY crafting, you help make workspaces more sustainable and unique. Share your projects, swap ideas, and keep coming up with new tin can crafts. This way, we celebrate the beauty of creative reuse.