


Did you know many DIY projects need soldering? This is true for fixing electronics or making jewelry. Starting with soldering can seem tough, but with the right help, you can learn fast.
I’ll show you the key tools, safety steps, and methods for effective soldering. This guide is here to kickstart your DIY adventure. It’s friendly and easy to follow, making learning fun.
By the end, you’ll know how to use soldering for many DIY tasks. This will boost your repair skills and creativity.
Key Takeaways
- Understanding the basics of soldering and its applications
- Learning essential tools and safety precautions
- Mastering techniques for effective soldering
- Applying soldering skills to various DIY projects
- Enhancing repair skills and creativity through soldering
Understanding the Basics of Soldering
To master DIY repairs, knowing how to solder is key. Soldering is a basic skill that lets you join two metal pieces together. This creates a strong and lasting bond.
What is Soldering?
Soldering is a method to join two metal pieces using a filler called solder. This filler has a low melting point. It’s used in many DIY projects, like electronics, jewelry making, and home repairs.
Why Soldering is Important for DIY Repairs
Soldering is vital for DIY repairs because it makes strong bonds between metal parts. This is very important in electronics. A weak or faulty solder joint can cause equipment failure.
| Application | Importance of Soldering |
|---|---|
| Electronics | Creates strong and reliable connections between components |
| Jewelry Making | Allows for detailed designs and durable bonds |
| Home Repairs | Helps fix metal items, such as pipes and fixtures |
Learning the basics of soldering prepares you for many DIY projects and repairs. Whether you’re new or experienced, knowing how to solder is a valuable skill.
Essential Tools for Soldering
Before you start soldering, you need to get the right tools. The right tools make the job easier and ensure a great finish.
Soldering Iron: The soldering iron is key. Look for one with good power, temperature control, and tip size. A quality iron is a big investment, but it’s worth it for the precision and reliability.
Soldering Iron
A soldering iron with adjustable temperature is best. It lets you work with different components and solder. For DIY repairs, a 20-60 watt iron is usually enough.
Solder Wire
The solder wire you pick depends on your project. For electronics, 60/40 tin-lead solder is common. But for lead-free projects, look for tin-silver-copper alloys.
When choosing solder wire, consider:
- Diameter: Thinner wires are better for detailed work, while thicker wires are faster for larger joints.
- Flux content: Solder wire with flux core helps in cleaning the metal surfaces, ensuring a strong bond.
Additional Tools You Might Need
While a soldering iron and solder wire are basic, other tools can help. These include:
- Third-hand tool or PCB holder to keep your work steady.
- Solder wick or desoldering pump for correcting mistakes.
- Safety glasses and a soldering iron stand for safety.
Getting these soldering equipment pieces will make soldering easier and more fun.
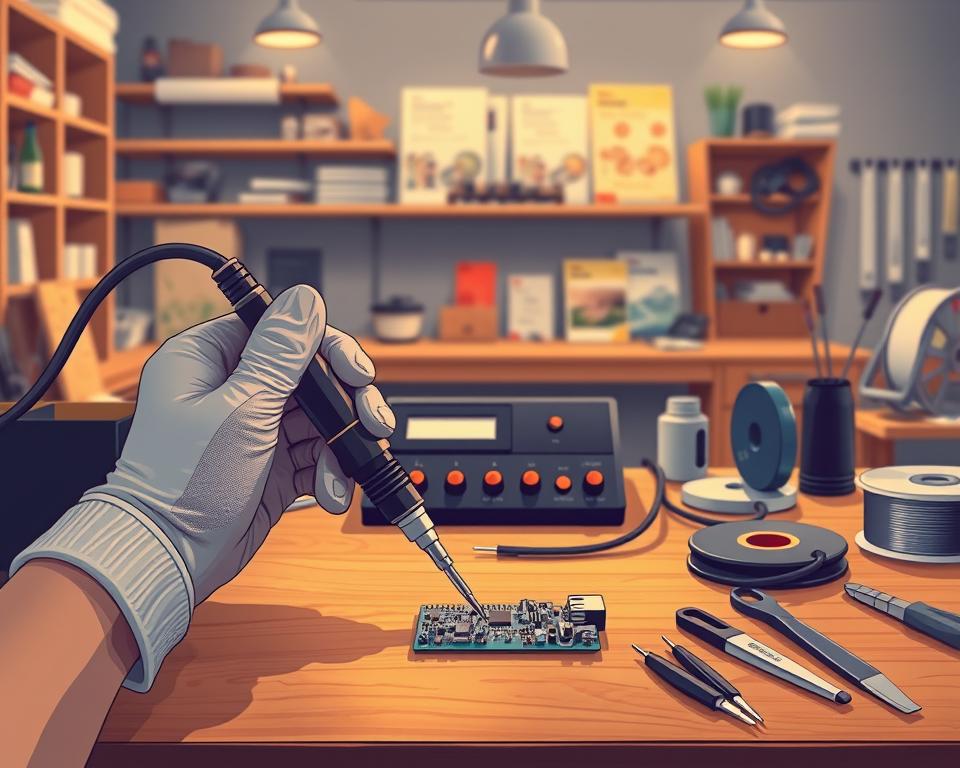
Safety First: Soldering Precautions
Before you start soldering, it’s important to know the risks and how to avoid them. Soldering involves high temperatures and molten metal. It’s also about working with materials that can be dangerous.
Personal Protective Equipment (PPE)
Wearing the right Personal Protective Equipment (PPE) is key when soldering. You need safety glasses to protect your eyes from hot solder splashes. Gloves keep your hands safe from burns, and a mask stops you from breathing in harmful fumes. For more tips, check out these 6 soldering safety tips to follow.

Make sure your PPE is made for soldering. Safety glasses should be heat-resistant and protect against flying debris. Gloves must be heat-resistant and give a good grip on irons and parts.
Ventilation and Workspace Setup
Good ventilation is key to avoid breathing in soldering fumes. Set up your workspace in a well-ventilated area or use a fume extractor. Also, keep your workspace clean and organized to prevent accidents. Make sure your work surface can handle heat and is free from flammable materials.
By following these safety tips, you can greatly reduce soldering risks. Always stay alert and keep learning to ensure a safe soldering experience.
Preparing Your Workspace for Soldering
A well-organized workspace is key to successful soldering. It boosts your productivity and keeps you safe from hazardous materials.
Organizing Your Tools
First, organize your soldering essentials within reach. This includes your soldering iron, solder wire, flux, and more. A tidy workspace prevents accidents and speeds up your work.
- Store your soldering iron safely when not in use, on a stand if possible.
- Label containers for your solder wire and other supplies to avoid mix-ups.
- Clear a space for your project, away from clutter and distractions.
Choosing the Right Surface
The surface for soldering is as vital as your tools. You need a heat-resistant surface to protect your worktable and keep you safe. A ceramic tile or soldering mat is perfect for this.
Also, make sure your workspace has good air flow. This stops you from breathing in soldering fumes. Work near a window or use a fume extractor for better air.
Types of Solder and Their Uses
Solder is key in the soldering process and comes in many types. Each type is best for different tasks. Knowing which solder to use is vital for a strong bond in your projects.
Lead vs. Lead-Free Solder
The debate on lead vs. lead-free solder is ongoing. Lead solder, a mix of 63% tin and 37% lead, is easy to use and makes high-quality joints. But, lead is toxic, so it’s being replaced in many areas.
Lead-free solder is made from tin alloys, often with silver or copper. It’s better for the environment but can be harder to work with. It has a higher melting point and might form cold solder joints.
| Solder Type | Composition | Melting Point | Applications |
|---|---|---|---|
| Lead Solder | 63% Tin, 37% Lead | 183°C | General electronics, repair work |
| Lead-Free Solder | Tin-Silver-Copper Alloy | 217°C – 220°C | Consumer electronics, RoHS compliant projects |
Specialty Solder for Different Projects
There are specialty solders for specific needs. For example, silver solder is for high-temperature jobs. It’s strong and conducts well.
Flux-cored solder is great for delicate or high-reliability projects. It has flux in the wire, helping solder flow better and reducing oxidation.
Knowing about different solder types helps you choose the right one for your project. This ensures a strong, durable, and reliable bond.
The Soldering Process: Step-by-Step
With the right tools, let’s dive into the soldering process. Learning this is key for great DIY repair results.
Preparing the Components
First, make sure your parts are clean. Proper preparation is key for a good solder. Use a soft brush or cotton swab to remove dirt or oxidation.

Heating the Joint
Heating the joint is a vital step. It’s important to heat evenly for a strong bond. Use the soldering iron to heat the joint area, keeping it in contact for a few seconds until it melts.
As
“Soldering is not just about melting the solder; it’s about creating a strong bond between the components.”
This quote highlights the need for good heating techniques.
Applying Solder
After heating, apply the solder. Touch the solder to the joint, not the iron, and let it flow. The solder should fill the gap smoothly.
- Ensure the solder flows into the joint.
- Avoid applying too much solder.
- Inspect the joint for any defects.
By following these steps, you’ll get a strong bond. Remember, practice makes perfect. Don’t get discouraged if it takes a few tries.
Common Soldering Techniques
To improve your DIY repair skills, learning different soldering techniques is essential. Soldering is a basic skill with many methods. Each method is best for certain jobs and parts.
Through-Hole Soldering
Through-hole soldering involves putting components into holes in a PCB and soldering them. It’s strong and simple to learn. It’s great for beginners and parts that need a solid hold.
To do this, you prepare the leads, heat the area with a soldering iron, and add solder. Make sure the solder flows well around the lead and pad. This creates a clean and strong joint.
Surface-Mount Soldering
Surface-mount soldering attaches parts directly to a PCB without holes. It’s best for today’s electronics because it makes designs smaller and can be automated for big productions.
This method needs precision and some practice. You apply solder paste to the pads, place the parts carefully, and then heat them to melt the solder. Using the right amount of solder paste and controlling the heat are key for reliable connections.
Both through-hole and surface-mount soldering have their benefits. Knowing when to use each is important for mastering soldering and growing your DIY repair skills.
Troubleshooting Soldering Issues
Soldering problems can happen even when you try your best. Knowing how to fix these issues is key to success. Problems can come from bad equipment, wrong technique, or the environment. It’s important to know how to spot and solve these problems for reliable solder joints.
Cold Solder Joints
A cold solder joint is weak and unreliable. It happens when solder doesn’t melt right. This can be due to not enough heat, bad technique, or dirty surfaces. To prevent this, make sure your iron is hot enough and you’re using the right amount of heat.
Joe Grand, a renowned electronics expert, says, “A good solder joint is all about the right amount of heat and solder.”
To fix a cold solder joint, reheat it and add a bit of new solder. Make sure the surfaces are clean. If it keeps happening, check your iron tip for wear and make sure it’s well-tinned.
Solder Bridges
A solder bridge is an unwanted connection between pins or conductors. It’s caused by too much solder. This can cause short circuits and make electronics malfunction. To avoid solder bridges, use the right amount of solder and be precise with your technique.
As the saying goes, “
Less is more
” when it comes to solder.
To fix a solder bridge, use a desoldering wick or a solder sucker to remove excess solder. If needed, re-solder the pins with the right amount of solder. Regular checks and the right tools can help avoid solder bridges.
Practicing Soldering Skills
Getting better at soldering takes practice and learning from mistakes. As you work on different projects, you’ll get better at soldering. You’ll develop the skills needed for high-quality work.
Simple Projects for Beginners
Starting with simple projects is a great way to build your confidence. Try tasks like:
- Repairing a broken jewelry piece
- Soldering a simple circuit board
- Creating a basic DIY decoration
These projects will help you get used to handling the soldering iron. You’ll learn how different materials react to heat and solder.

Tips for Improving Your Technique
To get better at soldering, focus on these techniques:
- Maintain the right temperature: Make sure your soldering iron is at the right temperature for the solder you’re using.
- Use the right amount of solder: Too little solder can make weak joints. Too much can cause solder bridges.
- Keep your workspace clean: A clean workspace helps avoid contamination and improves solder joints.
| Technique | Description | Benefit |
|---|---|---|
| Temperature Control | Adjusting the soldering iron temperature according to the solder type. | Prevents damage to components and ensures strong joints. |
| Solder Amount Control | Using the appropriate amount of solder for the joint. | Enhances joint strength and prevents solder bridges. |
| Workspace Organization | Keeping the workspace clean and organized. | Reduces errors and improves soldering quality. |
By practicing often and focusing on these techniques, you’ll get better at soldering. You’ll be able to handle more complex projects with confidence.
Maintaining Your Soldering Equipment
Keeping your soldering tools in good shape is key. It makes sure they work well for a long time. This is important for your DIY projects.
Cleaning the Soldering Iron Tip
Cleaning the soldering iron tip is very important. A dirty tip can cause bad solder flow and weak joints. Here’s how to clean it:
- Use a damp sponge to wipe away any debris.
- Avoid using too much force, which can damage the tip.
- For a deeper clean, use a tip cleaner or a special cleaning solution.
Regular cleaning stops oxidation buildup. It keeps your soldering iron working well.
Storing Your Tools Properly
Storing your soldering tools right is as important as cleaning. Here are some tips:
- Store your soldering iron in a dry place, away from direct sunlight.
- Use a soldering iron stand to keep the iron safe and prevent accidents.
- Keep your solder wire and other accessories organized in a designated storage box.
By following these simple tips, you can significantly extend the lifespan of your soldering equipment. It will keep working well for you.
Finding Resources and Communities
As you get better at soldering, using online resources and local groups can really help. Learning soldering is not just about doing it yourself. It’s also about learning from others and keeping up with new techniques.
“Soldering is an art that needs patience, practice, and good advice,” many DIY experts say. So, let’s look at some great resources for your soldering journey.
Online Tutorials and Videos
Online tutorials and videos are great for learning new soldering skills. Websites like YouTube, Instructables, and DIY forums have lots of info. You can find guides for all sorts of soldering projects, from easy to hard.
Joining Local Maker Spaces
Being part of a local maker space can really change your soldering game. These groups offer a place to share ideas, learn from others, and get hands-on experience. Many maker spaces also have classes on soldering and other DIY skills, which is super helpful for beginners and experts alike.
By using online resources and joining local groups, you can learn faster and stay excited about soldering. As the DIY soldering guide says, the secret to getting good at soldering is to keep practicing and be open to learning from others.
Expanding Your Soldering Knowledge
As you get better at soldering, you might want to try more advanced techniques. You can also mix soldering with other DIY skills. Mastering basic soldering has given you a strong base for more complex projects.
Advanced Soldering Techniques
Now, you can learn advanced techniques like desoldering and soldering complex parts. Desoldering needs precision and patience. It’s a key skill for fixing and reworking electronic circuits.
When working with complex parts, it’s important to follow safety tips. This helps avoid damaging parts or getting hurt.
Combining Soldering with Other DIY Skills
Mixing soldering with other DIY skills can make your projects better. For example, combining woodworking with electronics can create unique items. Like custom cases for electronic devices.
By growing your skills, you can take on a variety of projects. From simple fixes to complex builds, you’ll improve your DIY skills.