


Want to give your home a new look? Try painting your front door. A fresh door can make your home look better and feel welcoming. I tried it myself and found it was really easy.
I used five simple steps to get a great result. In this article, I’ll share my experience. I’ll give you tips to help you paint your door like a pro.
Key Takeaways
- Prepare your door for painting by cleaning and sanding it.
- Choose the right paint and primer for your door.
- Apply thin coats of paint for a smooth finish.
- Don’t forget to paint the door’s hardware.
- Seal your work with a clear coat for durability.
Why I Decided to Paint My Front Door
I chose to paint my front door to add a personal touch and protect it. I thought about how it would look and last. This was a big decision for me.
I wanted to boost my home’s curb appeal. A nice front door makes a great first impression.
The importance of curb appeal
Curb appeal is key for your home’s look. A new front door color can really make your home look welcoming.
Here are some benefits of improving curb appeal:
- It makes your home more attractive to buyers
- It creates a good first impression for visitors
- It boosts your pride in your home’s look
Personalizing my home
Painting my front door let me add a personal touch. I picked a color that shows my style. This makes my home unique.
Some popular painted front door colors include:
| Color | Description | Ideal For |
|---|---|---|
| Bright Red | A bold, vibrant color | Homes with a modern or traditional style |
| Soft Blue | A calming, serene color | Homes in coastal or rural areas |
| Deep Green | A rich, earthy color | Homes surrounded by nature or with a rustic style |
Protecting my door from the elements
Painting my front door also protects it from the weather. This helps my door last longer.
Thinking about these points helped me decide to paint my front door. Now, my home’s entrance is both attractive and durable.
Choosing the Right Color
Choosing the right color for my front door was a thoughtful process. It required patience and careful consideration. I knew the color would not only enhance my home’s curb appeal but also reflect my personal style.
How I Selected a Color Palette
I started by looking at my home’s exterior color scheme. I considered the siding, roof, and landscape to find a palette that complements them. I also drew inspiration from painted front door colors I saw in my neighborhood and online.
I narrowed down my options to a few color families. I thought about the emotional impact of different colors. For example, a bold red can welcome guests, while a soft blue can bring calmness.
Testing Samples on the Door
After narrowing down my options, I tested samples on my front door. This step was key because it showed how colors looked at different times and in various lights. I applied small patches of paint and observed them in the morning, afternoon, and evening.

Considering My Home’s Style
The style of my home was also important in choosing a color. For a traditional home, I considered classic colors like white, black, or rich wood tones. For a modern home, I looked at bold and bright colors to make a statement. I chose a color that complements my home’s style and enhances its appearance.
By carefully considering these factors and testing different options, I found a color I love. The right color has made a big difference, and I’m thrilled with the result.
Gathering Necessary Supplies
After deciding to paint my front door, I started gathering supplies. I wanted to make sure I was ready for the job.
Choosing the right supplies was key for my DIY project. It helped me have everything needed and made me think about quality and cost.
Tools and Materials I Used
I made a list of the tools and materials I needed. These included:
- High-quality exterior paint for my door
- Different sizes of paintbrushes
- A roller and extension pole for a smooth finish
- Painter’s tape for clean edges
- Drop cloths to protect the area
- Sandpaper for a smooth surface
Using the right tools and materials was important. As
“The right tool for the job makes all the difference in the world.”
, it was true for my project.
The Importance of Quality Paint
Choosing quality paint was a priority for me. Good paint gives a better finish and lasts longer.
| Paint Type | Finish | Durability |
|---|---|---|
| Low-quality paint | Dull finish | Less durable |
| High-quality paint | Smooth, even finish | More durable, resistant to fading |
Where I Found My Supplies
I bought my supplies at local hardware stores. I compared prices and quality to make good choices. Shopping locally helped my community and let me see the products first.
By choosing where to buy my supplies carefully, I found great products within my budget.
Preparing the Door for Painting
To get a professional look, I made sure to prepare my front door well. I took several important steps to ensure the paint went on smoothly and evenly.
Cleaning the surface thoroughly
I began by cleaning the door thoroughly to get rid of dirt, grime, and mildew. A clean surface is key for paint to stick well. I used a mild detergent and water, scrubbing gently with a soft-bristled brush, and then rinsed it off.
Removing hardware and accessories
Then, I removed all hardware and accessories from the door. This included the door handle, knocker, and any decorations. It helped avoid paint getting stuck in details and made painting easier. I kept these items safe so they wouldn’t get lost or damaged.
Taping off edges and windows
Lastly, I taped off the edges and windows around the door with painter’s tape. This ensured a clean, sharp finish by stopping paint from spreading to other areas. I applied the tape carefully, making sure it was straight and smooth.
By doing these steps, I was ready to paint my front door. This set me up for success with my DIY project.
Painting Techniques I Used
My front door painting project was a success thanks to the techniques I used. A few simple strategies helped me get a professional finish. This has greatly improved my home’s look from the outside.
The Paint Application Process
I began by getting my paint and tools ready. I picked a top-notch exterior paint for my door, no matter its material. Painting required some skill to get an even coat.
I painted in smooth strokes, starting from the top. This way, I avoided drips on the already painted parts.
Tips for Even Coverage
To get even coverage, I kept a wet edge and used thin coats. This method ensured a uniform look and saved time between coats. For detailed areas, I used small brushes for precision.
Addressing Difficult Areas
Some parts of my door, like raised panels and designs, needed extra attention. I mixed brushes and rollers for different textures and details. A small brush was best for designs, while a roller worked well for flat areas.
To wrap up, here’s a table showing the techniques and their uses:
| Technique | Application | Tool Used |
|---|---|---|
| Smooth Strokes | Flat Surfaces | Roller |
| Precision Painting | Intricate Details | Small Brush |
| Thin Coats | All Surfaces | Brush or Roller |
By using these techniques, I efficiently painted my front door. The result is a beautiful finish I’m proud of. These front door painting tips can help you achieve a great look, whether your door is wood, metal, or fiberglass.
Drying and Curing Time
After the final coat of paint, I wait for my front door to dry and cure. This step is key for a durable finish on my DIY project.
The Importance of Patience
Being patient is essential during this time. Rushing can result in a poor finish. The paint might not stick well or get scratched easily. So, it’s important to wait for the best results.
Factors That Affect Drying Time
Several things can change how fast the paint dries. Temperature and humidity are big factors. Warmer temperatures and lower humidity speed up drying. Cooler and higher humidity slow it down. The paint type also plays a role.

What to Do While Waiting
While waiting, I checked the door for any spots needing a second coat. I also planned my next steps, like putting back the hardware and accessories. It’s good to stay organized for the project’s next phases.
I also thought about other tasks for the house. Like touching up areas affected by painting or planning new DIY projects. This waiting time can be useful for other tasks.
Reinstalling Hardware and Accessories
After the paint dried, I put back the hardware and accessories on my front door. This step was key. It made the door work again and looked great.
When to put everything back
Wait until the paint is dry before putting back the hardware. This prevents smudges or damage.
Tips for proper alignment
To align the hardware right, I checked the screw holes. I then gently pushed the screws back in. For tricky parts, the maker’s guide is a big help.
Adding a final touch
After putting back the hardware, I checked the door. A damp cloth cleaned off any dust or dirt from the reinstall.
| Hardware/Accessory | Reinstallation Tip |
|---|---|
| Door Handle | Align screw holes carefully and tighten securely. |
| Door Hinges | Check for proper alignment and ensure smooth door operation. |
| Door Knocker | Make sure it’s securely fastened to avoid any rattling. |
By following these steps, I finished my front door makeover well. I learned the value of patience and detail in how to paint a front door.
Maintaining My Newly Painted Door
To keep my front door looking great, I follow a regular maintenance plan. This includes cleaning, checking, and touching up the paint as needed. This keeps the paint looking fresh and the door in good shape.
Regular Cleaning Techniques
Cleaning my front door regularly is key. I mix mild detergent with warm water to clean it. It’s important to avoid harsh chemicals or rough materials that could harm the paint or door.
I clean the door once a month, or more often if pollution or weather is bad. After cleaning, I dry the door well to avoid water spots.

Touch-up Tips for Longevity
Even with regular cleaning, my door might get small chips or scratches. I keep some of the original paint for touch-ups. I use a fine brush to cover the area, blending the edges with the rest of the paint.
If the damage is big, I might get a pro to fix it. Regular checks help me catch problems early, keeping the paint looking good longer.
Seasonal Maintenance Suggestions
Seasonal changes can affect my front door. In spring and summer, I look for winter damage like cracks or peeling paint. In fall, I get the door ready for winter by checking the hardware.
Here’s a quick guide to my seasonal maintenance:
| Season | Maintenance Task |
|---|---|
| Spring | Inspect for winter damage, clean door and hardware |
| Summer | Check for fading, apply protective coating if needed |
| Fall | Prepare door for winter, check and tighten hardware |
| Winter | Inspect for cold-weather damage, keep door and area clear of snow and ice |
By sticking to this routine, my front door stays in top shape. It keeps my home looking good and protects the door from the weather.
Common Mistakes to Avoid
Looking back, I see some mistakes I made painting my front door. It’s a simple DIY task if you plan well. But, there are traps that can ruin your work.
Pitfalls I Encountered
When I painted my front door, I hit a few unexpected problems. One big issue was uneven paint. This made some spots thicker than others. To fix this, use good paint and apply it in thin, even layers.
For tips on getting your front door ready for paint, check out this guide.
Miscalculations and How to Fix Them
Another mistake was not calculating the paint right. This caused delays and extra costs. To avoid this, measure your door well and ask a pro at the hardware store for the right paint amount.
Fixing mistakes as you go is key. If you see drips or uneven spots, fix them right away. This stops them from setting in the finish.
Lessons Learned for Next Time
Thinking about my experience, I learned a lot. I now know the value of patience and letting each coat dry fully before adding the next. This will help a lot in my next project.
Knowing these common mistakes helps you avoid them. This way, you can get a professional look on your front door. Whether you’re looking for front door painting ideas or just want to improve your home’s look, careful planning and doing are essential.
Cost Considerations for the Project
When I started painting my front door, I knew the cost was key. The total cost was a big part of my decision.
I first looked at budgeting for supplies. This meant figuring out the cost of paint, brushes, tape, and more. Choosing the best paint for my front door was important for looks, durability, and saving money.
Budgeting for Supplies
For supplies, I considered a few things:
- Paint and primer
- Brushes and rollers
- Tape and drop cloths
- Sandpaper and cleaning supplies
I looked at prices at various stores and online. This helped me find good deals without spending too much.
Comparing DIY vs. Professional Help
Choosing between doing it myself or getting a front door painting service was big. A pro can do a perfect job, but it costs more.
I thought about the good and bad of each choice:
- DIY: Saves money, feels rewarding, flexible timing
- Professional: Expert quality, saves time, work warranty
In the end, I chose to DIY front door painting. It fit my budget and let me learn something new.
Long-term Value of the Investment
The upfront cost for supplies and my time was worth it. Painting my door myself saved money and gave me a sense of pride.
Plus, a new front door makes my house look better and might even raise its value. This project was a smart choice for my home’s look and value.
Sharing My Experience and Results
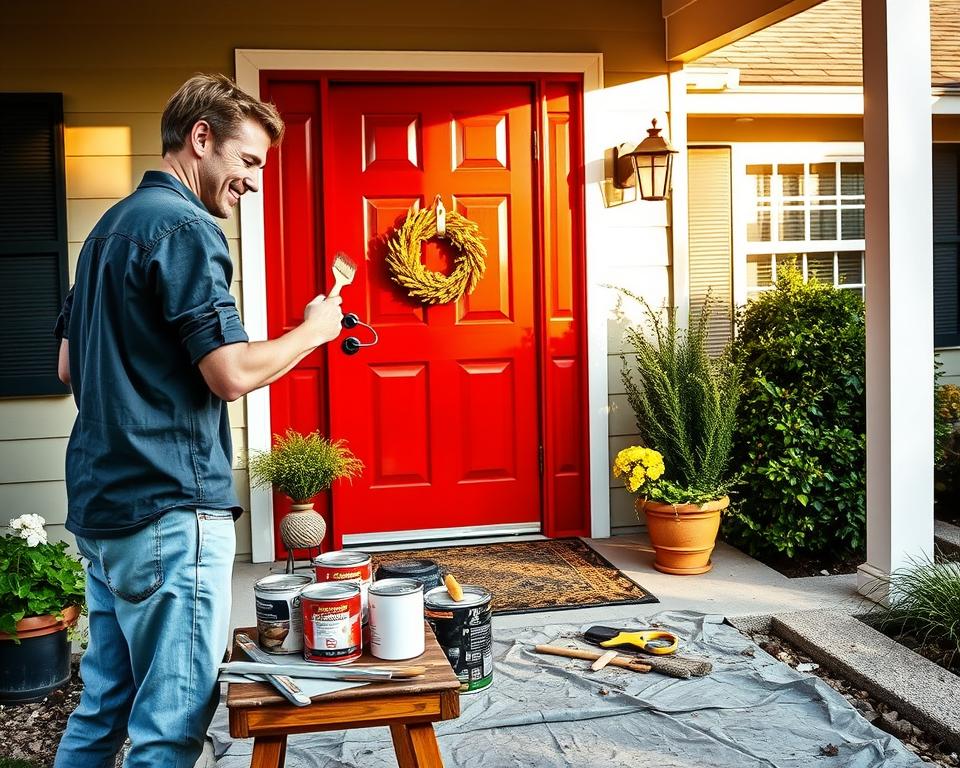
After finishing my front door makeover, I was overjoyed with the results. I chose to paint my front door Heritage Red by Benjamin Moore. This choice not only made my home look better but also added a personal touch.
The Transformation
Before and after photos showed a big difference. Friends and family loved the new look. The colors I picked matched my home’s style perfectly, making it more eye-catching.
Satisfaction with the Project
I was very happy with the project’s outcome. It made my home look better and gave me a sense of pride. If you’re thinking about painting your front door, look at different ideas. Find the one that best suits your home.