


Did you know a single scratch on wood can lower your furniture’s value by up to 10%? Whether you’re into DIY or just starting, fixing your furniture is simpler than you might think.
I’ll show you how to fix those annoying wood scratches and make your wooden items look new again. You’ll find the steps easy to follow, making you feel confident in your ability to do it.
By using this guide, you’ll not only make your furniture look better but also last longer. Let’s begin this simple yet effective wood scratch repair journey.
Key Takeaways
- Simple steps to repair wood scratches
- Easy-to-follow instructions for DIY enthusiasts and beginners
- Tips to enhance the appearance and extend the lifespan of your furniture
- Effective methods for covering wood scratches
- Restoring your furniture to its original beauty
Understanding Wood Scratches
To fix wood scratches, you need to know what they are and where they come from. Wood scratches are not just ugly; they can also weaken the wood if not fixed right.
Types of Wood Scratches
Wood scratches fall into two main categories: light and deep. Light scratches only touch the surface and can be fixed with simple items or a quick touch-up. Deep scratches, on the other hand, go deeper into the wood, sometimes showing the wood underneath. These need more work, like using wood fillers and sanding.
| Scratch Type | Description | Repair Approach |
|---|---|---|
| Light Scratches | Superficial, affecting only the finish | Simple household items or minor touch-ups |
| Deep Scratches | Penetrate further into the wood | Wood fillers, sanding, and potentially staining |
Causes of Wood Scratches
Knowing why wood scratches happen helps prevent them. Scratches often come from accidents, moving furniture, or pets and kids playing near furniture. Spotting these reasons helps you avoid scratches.
- Accidental impacts during daily activities
- Misaligned or rough furniture movement
- Pets or children interacting with the furniture
Being mindful of these causes lets you protect your wood furniture. Use felt pads on furniture legs or keep furniture away from busy areas.
Assessing the Damage
Checking the damage is key to fixing wood scratches. You need to know how deep and wide the scratch is.
Wood furniture scratches can be different in severity. Knowing if a scratch is light or deep helps choose the right fix.
Light vs. Deep Scratches
Light scratches only touch the surface or finish of the wood. They can be fixed with simple steps like using furniture polish or a walnut.
But, deep scratches go deeper into the wood. They might show the wood grain or harm the furniture’s structure. These need more work, like using wood filler and sanding.
Tools for Inspection
To really see the damage, you’ll need some basic tools. A magnifying glass or a lamp helps light up the scratch.
| Tool | Purpose |
|---|---|
| Magnifying Glass | To closely inspect the scratch |
| Lamp or Bright Light | To illuminate the scratch |
| Ruler or Caliper | To measure the depth and length of the scratch |
With these tools and knowing the scratch type, you can pick the best fix. This way, your wood furniture will look like new again.
Materials Needed for Covering Scratches
Covering scratches on wood needs careful material selection for a smooth finish. The right materials greatly affect your repair’s success.
Common Household Items
Think about what you have at home before buying special products. Household items can fix minor wood scratches. For example, rubbing a walnut on the scratch can stain it. Or, use furniture polish to improve the wood’s look and hide small flaws.
Household items like olive oil can clean and condition the wood. A soft cloth is key for applying touch-up materials carefully.

Specialized Repair Kits
For bigger scratches or if you want a precise fix, specialized kits are available. These kits include wood filler, stain or touch-up marker, and sometimes sealant. They help you get a professional repair at home.
When picking a kit, match it to your wood type and stain color. Some kits are for specific woods, so choose the right one. For more on fixing scratches, check out this guide.
| Material | Description | Use Case |
|---|---|---|
| Furniture Polish | A polish designed for wood furniture | Enhancing appearance, hiding minor scratches |
| Walnut | A nut used to stain scratches | Minor scratches, staining |
| Wood Filler | A compound used to fill deep scratches | Deep scratches, significant damage |
| Olive Oil | A natural oil for cleaning and conditioning wood | Cleaning, conditioning wood surfaces |
Quick Fixes for Light Scratches
Minor scratches on wood furniture can be fixed with items you have at home. These scratches might bother you, but they don’t have to ruin your furniture’s look. We’ll look at two easy ways to hide light scratches: using a walnut and applying furniture polish.
Using a Walnut
Using a walnut is a simple way to hide a light scratch. The walnut’s oil fills in the scratch, making it less visible. Just rub a walnut gently over the scratch until it’s covered. The natural oils blend the scratch with the wood around it.
Benefits of Using a Walnut:
- Easy to apply
- Uses a natural, non-toxic substance
- Can be effective for minor scratches
Applying Furniture Polish
Applying furniture polish is another good way to hide light scratches. It masks the scratch and protects your wood furniture. Choose a polish that matches your furniture’s finish. Put a small amount on a soft cloth and rub it into the scratch. Then, buff it with a clean cloth to remove extra polish and smooth out the area.
Tips for Applying Furniture Polish:
- Always test the polish on a small, inconspicuous area first
- Use a soft, lint-free cloth to avoid leaving marks
- Apply polish in the direction of the wood grain
| Method | Effectiveness | Ease of Use |
|---|---|---|
| Using a Walnut | High for minor scratches | Easy |
| Applying Furniture Polish | High for light scratches | Easy |
Dealing with Deep Scratches
Dealing with deep scratches requires the right materials and techniques. This approach helps restore your wood furniture to its original beauty. It’s a step-by-step process that can make a big difference.
Using Wood Filler
Wood filler is often the first choice for deep scratches. It’s a compound that can be colored to match your furniture. This makes it a great solution for covering scratches.
Start by cleaning the scratched area to remove any debris or dust. Then, use a putty knife to fill the scratch with the wood filler. Make sure to fill it slightly over the surface.
Let the filler dry as instructed by the manufacturer. This can take a few hours to overnight.
Tips for Choosing the Right Wood Filler:
- Match the filler color to your furniture as closely as possible.
- Consider the type of wood your furniture is made of to select the appropriate filler.
- Read reviews to find a highly-rated wood filler.
| Wood Filler Type | Drying Time | Color Options |
|---|---|---|
| Water-based | 2-4 hours | Various |
| Solvent-based | 4-6 hours | Multiple |
| Epoxy-based | Overnight | Limited |
Sanding Techniques
After the wood filler dries, it’s time to sand. Sanding smooths out the filled area to blend it with the surrounding surface. Start with a coarse-grit sandpaper (about 120-grit) and sand in the direction of the wood grain.
Check your progress often to avoid sanding too much material away. Once the area is smooth, switch to a finer-grit sandpaper (220-grit or higher) for a final polish.
Remember, patience is key when sanding. Taking your time will result in a more professional-looking finish.
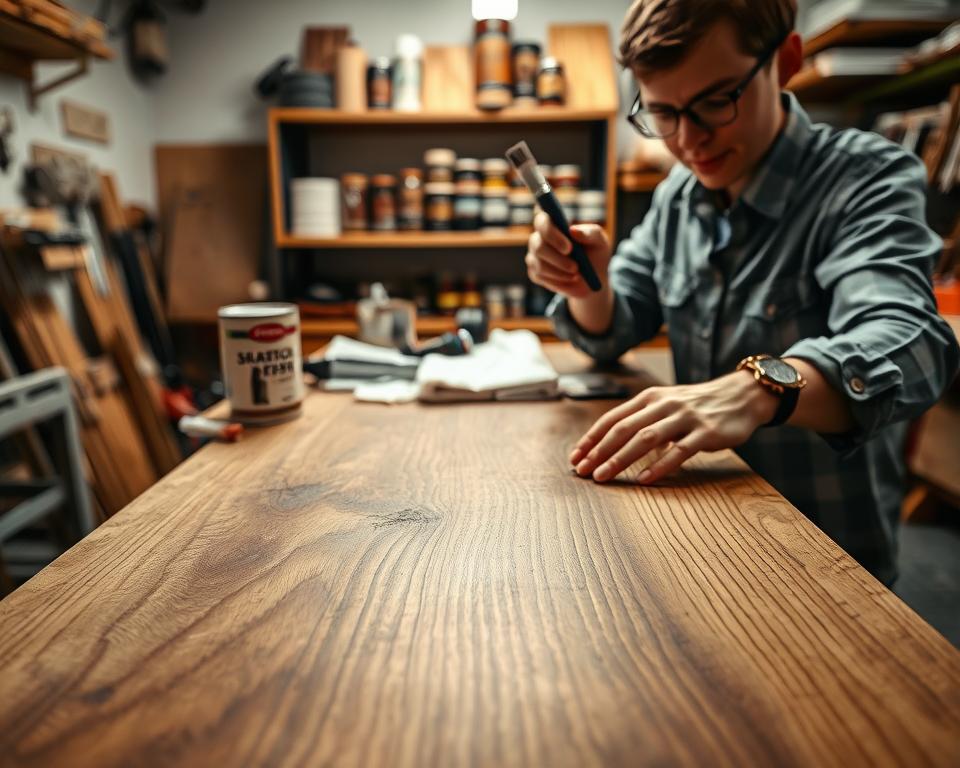
Staining and Coloring Wood
To fix a scratch well, you need to know how to stain and color wood. This makes the fixed area look like the rest of the surface. Staining and coloring wood are key steps. They not only cover up scratches but also make the furniture look better.
When staining and coloring wood, I first pick the right stain. The stain should match the wood’s original color as much as possible. If the scratch is on a surface with a specific finish, like glossy or matte, choose a stain that fits that finish for a uniform look.
Choosing the Right Stain
Picking the right stain is important. You need to think about the wood type, the color of the area around the scratch, and the finish you want. Here are some things to keep in mind:
- Know the type of wood you’re working with, as different woods take stain differently.
- Match the stain color to the wood around it. If needed, test the stain on a small, hidden area first.
- Think about the finish you want. Some stains are made to work under certain topcoats or sealants.
| Wood Type | Recommended Stain | Finish |
|---|---|---|
| Oak | Water-based oak stain | Matte |
| Maple | Oil-based maple stain | Glossy |
| Cherry | Oil-based cherry stain | Semi-gloss |
Applying Stain Evenly
After picking the right stain, the next step is to apply it evenly. This needs skill and the right tools. Here are some tips for even application:
Use a clean, soft cloth or a foam brush to apply the stain. Work in small sections for even coverage. Always follow the manufacturer’s instructions for application and drying times.

By carefully choosing the right stain and applying it evenly, you can hide wood scratches well. This will restore your furniture to its original beauty.
Finishing Touches
The final step in restoring your wood furniture involves applying the finishing touches. This stage not only makes your furniture look great but also keeps it safe from damage.
After fixing the scratches, you’ll want to make sure your wood furniture looks its best. Apply a sealant or topcoat to protect the wood and make it look even better.
Sealants and Topcoats
Sealants and topcoats are key in keeping your wood furniture safe from future scratches and spills. They act as a shield, making it easier to clean and keep your furniture in top shape. For more info on picking the right sealant or topcoat, check out woodworking resources.
| Type | Description | Benefits |
|---|---|---|
| Polyurethane | A clear coat that provides a hard, durable finish. | Resistant to scratches and spills. |
| Wax | A protective coating that enhances the wood’s appearance. | Easy to apply, provides a soft sheen. |
| Oil-based | A finish that penetrates the wood, enriching its grain. | Durable, easy to maintain. |
Buffing for a Glossy Finish
Buffing is key to getting a glossy finish. It uses a buffing pad or cloth to polish the wood, removing small flaws and adding a high-gloss sheen.
To buff your wood furniture well, start by putting a small amount of polish on the buffing pad. Rub the polish into the wood in a circular motion, covering small sections at a time. This spreads the polish evenly and avoids buildup.
By following these steps and adding the finishing touches, you can restore your wood furniture to its original beauty. It will stay protected for many years.
Preventing Future Scratches
Keeping your wood furniture looking great is more than just fixing scratches. It’s also about stopping them before they start. By taking early action, you can enjoy your furniture for many years without constant repairs.
Furniture Placement Tips
One easy way to avoid scratches is to think about where you put your furniture. Don’t place it in busy spots or near doors where it might get bumped. Also, make sure the floor is clean of dirt and dust, as these can cause scratches when furniture is moved.
Adding felt pads to your furniture’s legs can also help prevent scratches. This is key for chairs and tables that get moved a lot.
| Furniture Type | Placement Tip | Benefit |
|---|---|---|
| Coffee Tables | Place in low-traffic areas | Reduces risk of scratches |
| Chairs | Use felt pads on legs | Prevents floor and furniture damage |
Using Furniture Protectors
Furniture protectors, like covers and pads, add extra protection against scratches. They’re great for items that get used a lot, like dining tables and chairs.
Types of Furniture Protectors:
- Felt pads for chair and table legs
- Tablecloths and placemats for dining tables
- Furniture covers for sofas and armchairs
By using these methods, you can greatly lower the chance of scratches on your wood furniture. This keeps it looking good for a longer time.
Cleaning Wood Surfaces
Keeping your wood surfaces clean is key to their beauty and durability. Dust, dirt, and other substances can dull and damage your furniture over time. The right cleaning methods and products can help preserve your wood furniture’s look.
Recommended Cleaners
Choosing the right cleaners is essential to avoid harming your wood surfaces. Here are some cleaners you can use:
- Mild Soap Solution: A mix of mild soap and warm water works well. Make sure the soap doesn’t have harsh chemicals or abrasives.
- Wood Furniture Polish: Special polishes can make your furniture look better and protect it. Choose polishes that match your furniture’s finish.
- White Vinegar and Olive Oil: This mix can clean and condition your wood. Vinegar breaks down dirt, while olive oil moisturizes the wood.
| Cleaner Type | Suitable for | Benefits |
|---|---|---|
| Mild Soap Solution | Most wood finishes | Gentle, effective for daily dust and dirt |
| Wood Furniture Polish | Enhances appearance, protects finish | Provides a glossy finish, protective layer |
| White Vinegar and Olive Oil | Wood conditioning, gentle cleaning | Moisturizes wood, environmentally friendly |
Cleaning Techniques
Using the right cleaning technique is as important as the right cleaner. Here are some tips:
- Dust Regularly: Use a soft, dry cloth to dust your wood furniture often. This stops dust from building up and scratching the surface.
- Dampen, Don’t Soak: When using a damp cloth, make sure it’s not too wet. Too much water can harm the wood or its finish.
- Wipe in the Grain Direction: Always wipe your wood furniture in the direction of the grain. This prevents scratching the surface.
- Dry Thoroughly: After cleaning, dry your furniture with a dry cloth. This prevents water spots.

By following these guidelines and using the right cleaners and techniques, you can keep your wood surfaces clean and beautiful. Regular cleaning not only makes your furniture look better but also helps it last longer.
When to Call a Professional
Some wood scratches are too deep or complex for DIY fixes. This means you need a professional’s help. DIY repairs work well for small scratches, but some damage needs a pro’s touch to look new again.
Signs You Need Expert Help
Look out for these signs to know when to call a pro: deep scratches that show the wood beneath, scratches on old or valuable items, or big damage areas. Experts have the right tools and skills to fix tough damage without harming your furniture.
If your DIY fix didn’t work out, or you’re not sure about your furniture’s finish or material, it’s time to get help. A pro can save you time and prevent more damage.
Finding a Reliable Service
To find a good wood repair service, ask friends, family, or check online reviews. Look for someone with experience in fixing furniture and see their past work. A trusted service will give you a clear price and promise their work.
Get quotes from a few places and compare what they offer. Make sure the pro uses top-notch materials and knows about different woods and finishes.
Knowing when to ask for help and finding a reliable service will keep your wood furniture looking great. It will stay beautiful and valuable for many years.
DIY vs. Professional Repair
There are two main ways to fix wood scratches: DIY or professional service. Each has its own pros and cons. Knowing these differences helps you make a better choice.
Cost Comparison
Cost is a big factor when choosing DIY or professional repair. DIY fixes usually cost between $10 and $50. This depends on the scratch’s size and the quality of the materials.
Professional repairs, though, can cost more. Prices range from $100 to $500 or more. This depends on the damage’s extent and the repair person’s rates.
| Repair Type | Cost Range | Average Cost |
|---|---|---|
| DIY Repair | $10-$50 | $30 |
| Professional Repair | $100-$500 | $300 |
Time Investment
Time is another important factor. DIY repairs take a lot of time, even if you’re experienced. You’ll need to prepare the surface, apply filler, sand, stain, and finish. This can take hours to days, depending on the products.
Professional repairs might cost more but save you time. They can finish the job in a day, depending on their schedule and the repair’s complexity.
In the end, your choice depends on your budget, the damage’s extent, and your preference for time and quality. DIY is cheaper but takes more time. Professional repairs are faster but more expensive.
Conclusion: Restoring Your Wood Furniture
Covering wood scratches is easy with the right tools and methods. Follow the steps in this guide to make your wood furniture look new again. You’ll learn the best ways to cover scratches.
Regular Maintenance is Key
Keeping your wood furniture in top shape is all about regular care. Use the right methods to hide scratches and remove them when needed.
This way, your furniture will stay scratch-free for a long time. Remember, tackling scratches early is key to keeping your furniture looking great.
Enjoy Your Restored Furniture
Now that your furniture is fixed, you can enjoy it for many years. Whether it’s an old family treasure or a new addition, taking good care of it will keep it beautiful and useful.
By using the tips from this guide, you’ll keep your wood furniture looking amazing. This will help you get the most out of your investment in restoring your wood furniture.